All About Leather
How to Burnish Leather
Sep
Hello, leather crafting aficionados! Are you searching for tips on “How to Burnish Leather” to elevate your DIY projects or professional creations? You’ve landed on the perfect guide. Leather burnishing is the secret sauce behind those polished, smooth edges that you see on premium leather goods. Not only does it dramatically improve the aesthetic appeal of your leather items, but it also boosts their durability. In this comprehensive article, we’ll demystify the art of leather burnishing, detailing everything from the essential tools to a handy step-by-step guide. So stick around, and let’s turn those rough edges into slick, eye-catching finishes!
[INTERESTING: How to Work With Leather?]What is Leather Burnishing?
If you’re new to the term, “leather burnishing” refers to the process of smoothing and polishing the cut edges of leather to achieve a finished look. Think of it as the “icing on the cake” that makes good leatherwork great. Burnishing does more than just making the edges look pretty; it serves practical purposes too. It helps to seal off the exposed fibers, making the leather less prone to fraying and wear. This not only adds a professional touch but also extends the lifespan of your leather goods.
Now, you might be wondering, “Is this step really necessary?” The answer is a resounding yes! If you’re aiming for quality and durability, burnishing is not a step you’ll want to skip. Whether you’re crafting wallets, belts, or any other leather item, a well-burnished edge can transform your project from amateur to artisan.
Tools Needed for Burnishing Leather
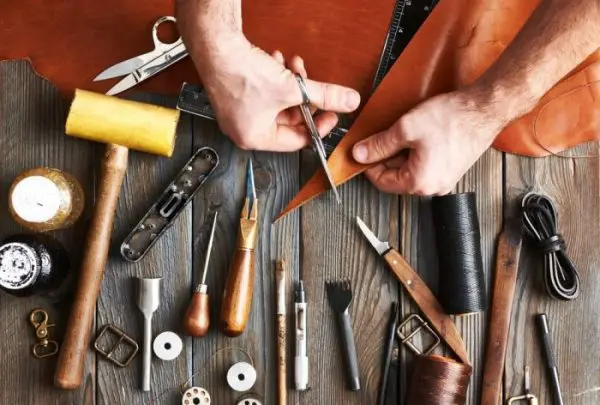
Before diving into the process, let’s get our toolkit ready. Leather burnishing requires some specific tools to get the job done right. Don’t worry; you won’t need an entire workshop! Here are the must-haves:
-
Edge Burnishers
These specialized tools come in various shapes and sizes to accommodate different leather thicknesses. They’re usually made of wood, bone, or metal.
-
Bone Folders
A versatile tool that can be used for both burnishing and creasing leather, bone folders are excellent for small, intricate projects.
-
Gum Tragacanth or Edge Kote
These substances help to smooth out the leather fibers, making the burnishing process easier and more effective.
-
Damp Cloth
You’ll need this to slightly moisten the leather’s edges before you begin burnishing.
-
Fine Sandpaper
A piece of 400- to 600-grit sandpaper can help prepare the edges by removing any loose fibers.
-
Optional
Electric Edge Burnisher: For those who are looking to burnish leather in large quantities or simply prefer a machine’s consistency, an electric edge burnisher could be a worthy investment.
DIY Alternatives
Don’t have these tools handy? You can also get creative with household items! A simple wooden spoon or the back of a screwdriver can serve as a makeshift burnisher in a pinch.
[RELEVANT: The Basics of Leather Working]Types of Leather Suitable for Burnishing
Not all leather is created equal, especially when it comes to burnishing. Understanding the kind of leather you’re working with can greatly influence the quality of your burnish. Here’s a rundown:
-
Vegetable-Tanned Leather
This type of leather is an excellent candidate for burnishing. It responds well to water and edge-coating substances, making it easier to achieve a smooth, polished finish.
-
Chrome-Tanned Leather
Although it’s more challenging to burnish than vegetable-tanned leather, it’s not impossible. You might need some additional edge-coating products to get that polished look.
-
Oil-Tanned Leather
This leather is softer and generally doesn’t hold a burnish well. It’s best used for projects where a rustic, unpolished look is desirable.
Types to Avoid
-
Suede and Nubuck
Due to their textured, fuzzy surface, these types of leather are not suitable for burnishing.
This is made from leather scraps and fibers mixed with adhesive. It doesn’t respond well to burnishing and can even degrade more quickly if you try.
-
Synthetic Leather
Most synthetic leathers, including vegan leather, don’t hold up well to burnishing due to their plastic-based composition.
[GOOD READ: Why is Real Leather Better Than Vegan Leather?]By knowing what kind of leather you’re dealing with, you can tailor your burnishing process accordingly and achieve the best possible results.
Step-by-Step Guide to Burnishing Leather
Ready to get your hands a little dirty? Great! Let’s move on to the actual burnishing process. Follow these steps to achieve those smooth, polished edges that are the hallmark of quality leatherwork:
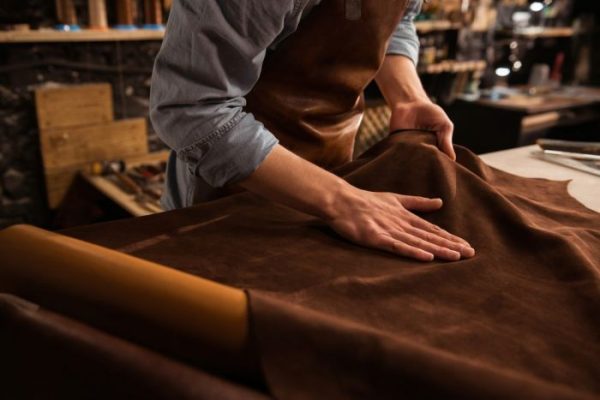
1. Preparing the Leather
Trim any excess fibers: Use a sharp knife or rotary cutter to remove loose threads or fibers from the edge you plan to burnish.
Sand the edges: With fine-grit sandpaper, lightly sand the edges to create an even surface.
2. Dampening the Edge
Moisten the cloth: Dampen a clean cloth with water.
Apply to the edge: Gently wipe the leather edge with the moistened cloth. This prepares the leather for the application of any edge-coating substances.
3. Applying Gum Tragacanth or Other Solutions
Dip a fingertip or sponge: Take a small amount of Gum Tragacanth or Edge Kote on a sponge or your fingertip.
Rub into the edge: Apply the substance evenly along the edge of the leather, using smooth, consistent strokes.
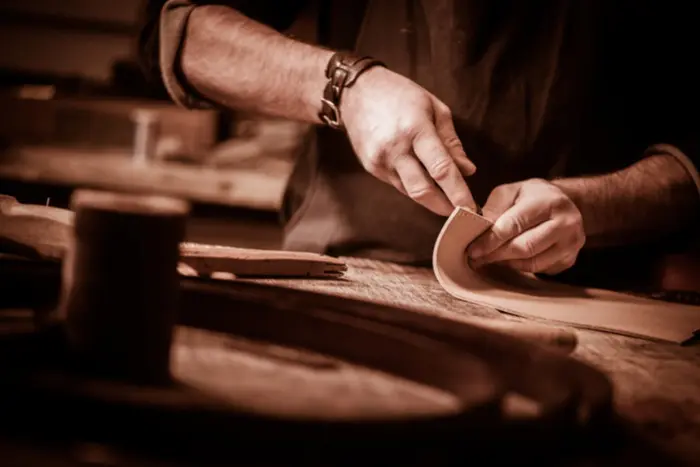
4. Using the Burnishing Tool
Choose the right tool: Select an edge burnisher or bone folder that fits the thickness of your leather.
Work the edge: Run the tool back and forth along the moistened, coated edge. Apply moderate pressure and increase your speed gradually. You’ll start to notice the edge becoming smoother and shinier.
5. Checking and Refining the Finish
Inspect the edge: After you’ve spent some time burnishing, pause to inspect your work. If it’s not as smooth as you’d like, you may need to repeat steps 2 through 4.
Additional coats: For an even more polished look, you can apply additional coats of Gum Tragacanth or Edge Kote and repeat the burnishing process.
And there you have it! With a bit of practice and the right tools, you’ll be producing leather goods with beautifully burnished edges in no time.
Tips and Tricks
Now that you’ve got the basics down, let’s fine-tune your skills with some pro tips:
-
Test First
Before you jump into burnishing the main project, always test your technique on a scrap piece of the same leather. This allows you to refine your approach without risking the main piece.
-
Be Patient
Burnishing is a technique that can’t be rushed. Take your time to get even strokes and consistent pressure for the best results.
-
Mind the Temperature
Leather can be sensitive to temperature changes. Try to work in a space with consistent temperature and humidity for the most predictable results.
-
Multi-Step Sanding
If you’re looking for a mirror-smooth finish, consider sanding the edges using progressively finer grits of sandpaper before you start the burnishing process.
-
Cleaning
Always make sure to clean your tools after use to keep them in optimal condition for future projects.
-
Don’t Overdo It
While it’s tempting to keep adding more and more coats of Gum Tragacanth or Edge Kote, sometimes less is more. Overcoating can result in a gummy, uneven finish.
-
Alternative Methods
If you find traditional methods too time-consuming, there are mechanical burnishers and even Dremel attachments specifically designed for burnishing leather. These can be a good investment if you plan to do a lot of leatherwork.
By keeping these tips in mind, you’ll be well on your way to mastering the art of leather burnishing, adding that professional touch to all your future leather projects.
Wrapping It Up
And there you have it—the complete guide on “How to Burnish Leather.” By now, you should have a robust understanding of what leather burnishing is, the tools you’ll need, and the step-by-step process to achieve those irresistibly smooth and polished edges. Whether you’re a seasoned leatherworker or a passionate beginner, mastering the art of leather burnishing can significantly elevate the quality of your projects. And let’s not forget the invaluable tips and tricks to make the process even more efficient and rewarding. So go ahead, give your leather items the finishing touch they deserve. Happy crafting!
If you found this article somewhat useful or interesting, you can follow us on Facebook and Instagram for more relevant information and tips. We also have a huge collection of HOW TO articles in our blog section covering all major and minor topics related to leather. Check it out!